Zero-1-Earth!

To content | To menu | To search

Sunday, May 2 2010

testing files integrity across an archive of data

I currently cooking a system, largely based on bash, to collect remote sensing data from the web. Since I’m using my personal ADSL connection, I can expect to have many corrupted downloads. I made a little script to check files integrity, and trigger again their download.

First, how to know if a file is corrupted or not? Two technics: either your collect the error code from you download software (ftp here) and log them somewhere to try again or you are able to assess the integrity of a file simply by scanning it. Let’s consider the second case.

The central problem is that you may have various kind of file, so there is not a method per kind of file to check. For example, if we download modis files we have an xml and an hdf file. For a given file, the script must first guess the type of file, then choose an ad-hoc function for checking this file. We assume here that the file type is found by considering the file extension.

To get the file extension from a full file path, simply remove the file path and keep what you find after the last ‘.’, which is a job for sed:

echo $fileFullPath | sed 's/^.*\///' | sed 's/^.*\.//' | tr '[:upper:]' '[:lower:]'

Command

sed 's/^.*\///'

removes the file path, by substituting repetitions (*) of any characters (.*) with nothing, starting from the string beginning (^). Then anything up to the last point is removed (think to escape the point \.).
Note that the regular expression of your system may give different result: give it some tries.

Now we need to call the appropriate test routine as a function of the detected file extension: a simple case function will do this job. Finally, let’s wrap-up everything in a single function (selectFunc): call it with a file name, and it returns the test function to call.

function selectFunc(){
# receives a file name and decides which integrity test function corresponds
if [ $# -ne 1 ]; then
echo "selectFunc is missing a single parameter. Exit."
return -1
fi
selector=$(echo $1 | sed 's/^.*\///' | sed 's/^.*\.//' | tr '[:upper:]' '[:lower:]')
case $selector in
xml) selectFunc='doTestXML';;
hdf) selectFunc='doTestImg';;
tif | tiff ) selectFunc='doTestImg';;
esac
# return the selected function
echo $selectFunc
}

We can see that there is a pending problem with respect to file without an extension, like ENVI native file format (it does not require an extension, only a companion text file). To improve this situation, you can either force an extension to this kind of files (like .bil or .bsq for ENVI files), or handle the case of missing extension with additional tests. For example, one could image to call gdalinfo in this case.

Now we just have to write some test functions.

xml files are rather easy to test. Your OS should have a function for that. For Linux, consider xml Starlet, which command line is

xml -val $file

For images, you should be able to test most of them with gdalinfo.
The function return 0 is everything was ok, 1 else. Actually, the tests functions return the return code of xml starlet and gdalinfo. If you use other kind of test, you may need to translate their exit codes.
At the end, we’ve got something like:

function doTestXML(){
if [ $# -ne 1 ]; then
echo "doTestXML is missing a single parameter. Exit."
exit -1
fi
xmlwf $1 >& /dev/null
return $?
}

function doTestImg(){
if [ $# -ne 1 ]; then
echo "doTestXML is missing a single parameter. Exit."
exit -1
fi
gdalinfo $1 >& /dev/null
return $?
}

Note we sent to null any output of the function and take care only of the return code ($?).

Now, all to use this code:
get the name of the test function to call:

myTest=$(selectFunc $file)

and call the script:

$myTest $file

A functional copy of the code is found there.

Tuesday, April 20 2010

Removing 10 first lines of a text file

How to remove the 10 first lines of a text file? Easy job with sed (Stream EDitor):

sed '1,10d' myFile

Example: removing 10 first lines of all text files in a directory.

for file in *.txt
do
sed '1,10d' $file > output_dir/new_${file}
done

Further readings: 

Tuesday, April 6 2010

ntfs hard drive on Snow Leopard

Note: this post proposes a trick at your own risks!

I’m willing to backup-up 1.5Tb of data I have on my office computer, and use them on my Mac OS X (Snow Leopard) computer at home. By default, Mac OS X can format, read and write Fat32 (MS-DOS) to share an hard drive with a Windows PC. Unfortunately, MS-DOS format is a bit outdated, and would not support partition larger than 1Gb, which would force me to make two partitions on my drive, while I would prefer only one.

Although it is not visible by default, Mac OS X Snow Leopard (10.6) support NTFS. To activate the support, you must declare your new drive in /etc/fstab (the file used by Unix/Linux systems to mount devices).

You must first get some infos: plug in your hard drive. In my case, the drive mounts with the name “Elements”.

open a terminal and type the following command:

diskutil info /Volumes/Elements

you’ll see more information about the drive, check it is NTFS formatted.

By default, file /etc/fstab is not created on Mac OS X. If it already exists, make a copy first:

sudo cp /etc/fstab /etc/fstab_org

sudo command will prompt for the administrator password (to run the copy command in directory /etc where you should not have rights to write as a normal user).

edit it (you can use nano to edit the file, or any other plain text editor):

sudo nano /etc/fstab

and add the line:

LABEL=Elements none ntfs rw

(replace Elements with the label name of your hard drive).

Reboot the computer to force reading /etc/fstab and mounting your drive as a read/write NTFS drive.

Job done!

For perfectionists: if your drive shows a UUID when you enter command diskutil info /Volumes/Elements, then you can edit your /etc/fstab with

UUID=XXXXXXX none ntfs rw

where XXXXXXX is the UUID number shown by diskutil. This should allow recognizing the drive even if you change its label name.

Monday, February 22 2010

Transform a simple tiff into geotiff

How to transform a simple tiff, or any image, into a georeferenced image, for example a geotiff. Quite simple with gdal_translate.

For this example, I took a random image, actually a photo of two elephants I took in Botswana. gdalinfo gives the following information about this image:

Driver: GTiff/GeoTIFF
Files: IMG_8552.tif
Size is 3456, 2304
Coordinate System is `'
Metadata:
TIFFTAG_DATETIME=2009:08:22 09:22:37
TIFFTAG_XRESOLUTION=72
TIFFTAG_YRESOLUTION=72
TIFFTAG_RESOLUTIONUNIT=2 (pixels/inch)
Image Structure Metadata:
INTERLEAVE=PIXEL
Corner Coordinates:
Upper Left  (    0.0,    0.0)
Lower Left  (    0.0, 2304.0)
Upper Right ( 3456.0,    0.0)
Lower Right ( 3456.0, 2304.0)
Center      ( 1728.0, 1152.0)
Band 1 Block=3456x12 Type=Byte, ColorInterp=Red
Band 2 Block=3456x12 Type=Byte, ColorInterp=Green
Band 3 Block=3456x12 Type=Byte, ColorInterp=Blue
Driver: GTiff/GeoTIFFFiles: IMG_8552.tifSize is 3456, 2304
Coordinate System is `'Metadata:  TIFFTAG_DATETIME=2009:08:22 09:22:37  TIFFTAG_XRESOLUTION=72  TIFFTAG_YRESOLUTION=72  TIFFTAG_RESOLUTIONUNIT=2 (pixels/inch)
Image Structure Metadata:
INTERLEAVE=PIXEL
Corner Coordinates:Upper Left  (    0.0,    0.0)
Lower Left  (    0.0, 2304.0)
Upper Right ( 3456.0,    0.0)
Lower Right ( 3456.0, 2304.0)
Center      ( 1728.0, 1152.0)
Band 1 Block=3456x12 Type=Byte, ColorInterp=RedBand 2 Block=3456x12 Type=Byte, ColorInterp=GreenBand 3 Block=3456x12 Type=Byte, ColorInterp=Blue

As you can see there is absolutely no geographic information yet. Let’s says, even if it is absurd for this photo, that the corners are geolocated. gdal_translate options -a_ullr ulx uly lrx lry overrides the georeferenced bounds of the ouptut file and -a_srs srs_def overrides the projection for the output file.
Let’s give it a try:

gdal_translate -of gtiff -co "compress=LZW" -a_ullr -26 38 0 0 -a_srs "wgs84" IMG_8552.tif withCoordinates.tif

Now the result is georeferenced, as demonstrated by gdalinfo:

Driver: GTiff/GeoTIFF
Files: withCoordinates.tif
Size is 3456, 2304
Coordinate System is:
GEOGCS["WGS 84",
DATUM["WGS_1984",
SPHEROID["WGS 84",6378137,298.2572235630016,
AUTHORITY["EPSG","7030"]],
AUTHORITY["EPSG","6326"]],
PRIMEM["Greenwich",0],
UNIT["degree",0.0174532925199433],
AUTHORITY["EPSG","4326"]]
Origin = (-26.000000000000000,38.000000000000000)
Pixel Size = (0.007523148148148,-0.016493055555556)
Metadata:
AREA_OR_POINT=Area
TIFFTAG_DATETIME=2009:08:22 09:22:37
TIFFTAG_XRESOLUTION=72
TIFFTAG_YRESOLUTION=72
TIFFTAG_RESOLUTIONUNIT=2 (pixels/inch)
Image Structure Metadata:
COMPRESSION=LZW
INTERLEAVE=PIXEL
Corner Coordinates:
Upper Left  ( -26.0000000,  38.0000000) ( 26d 0'0.00"W, 38d 0'0.00"N)
Lower Left  ( -26.0000000,   0.0000000) ( 26d 0'0.00"W,  0d 0'0.01"N)
Upper Right (   0.0000000,  38.0000000) (  0d 0'0.01"E, 38d 0'0.00"N)
Lower Right (   0.0000000,   0.0000000) (  0d 0'0.01"E,  0d 0'0.01"N)
Center      ( -13.0000000,  19.0000000) ( 13d 0'0.00"W, 19d 0'0.00"N)
Band 1 Block=3456x1 Type=Byte, ColorInterp=Red
Band 2 Block=3456x1 Type=Byte, ColorInterp=Green
Band 3 Block=3456x1 Type=Byte, ColorInterp=Blue

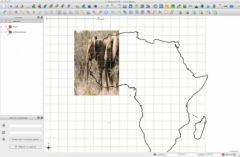
and QuantumGis can easily use this image as geospatial raster:

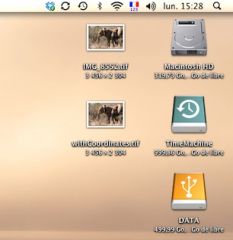
Mac OSX sees the image as any tiff image:

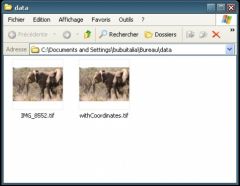
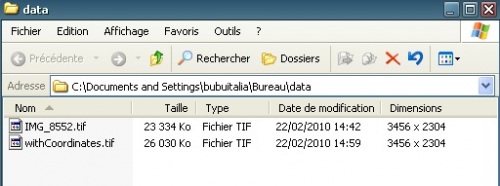
Same thing with Windows, images are seen as normal tiff images, Windows show their quicklook and dimensions, geographical meta-data are ignored.


Thursday, November 19 2009

Text file processing with IDL

A friend recently asked me how to process a text file. It was a collection of measurements of plants roots (size and mass) made at various depths from different pits; looking like (after some formatting):

id depth_name mass size 1 30-50 0.5 10 1 30-50 0.45 3 1 30-50 0.3 4.2 1 50-70 0.7 5 1 50-70 0.72 5.3 ... ... ... ... 2 30-50 0.8 4

This friend needed to sum up roots lengths for a same pit and depth.
First you have to format well your file. By well formatted, I mean: use a separator like a comma ‘,’ or a space (if not ambiguous). Then read the file with the READ_ASCII command:

pro process_file
textfile='path/to_my/textfile.txt'
data=read_ascii(textfile, template=ascii_template(textfile))
end
read_ascii

excepts a file template (you can indicate to jump some heading line, choose a column separator and indicate the data type per column). In this case, I choose a string format for the second column.
Alright. The read_ascii command stores the text file value in the data structure. In this case, data has the following fields:
data.field1 stores pits ids
data.field2 stores depths labels
data.field3 stores the mass column
data.field4 stores the roots length column.
Note the structure is ‘field’ par idl, you can’t change it.

Le’s say we want the list of pits ids:

listpitds=data.field1(uniq(data.field1))
uniq function returns ending position of continuous series of values in an array.
Let’s loop over the list of pit ids, and for each pit id, get the list of unique depths-labels (again!) and for these selected lines, sum up roots lengths:

for ipid=0, n_elements(listpits)-1 do begin ; now get list of depths NAMES wherePits = where(data.field1 EQ listpits[ipid]) allDepths=data.field2(wherePits) listDepths=allDepths[uniq(allDepths)] ; now for this pit id, sum for each type of depths for idepths=0, n_elements(listDepths)-1 do begin ; get position of data to sum wts = where( (data.field1 eq listpits[ipid]) AND ( strcmp(data.field2, listDepths[idepths]) ) ) print, 'pits: ',strcompress(listpits[ipid]), ', at depth: ',  listDepths[idepths],' cm total root length is ', total(data.field5[wts]) endfor endfor

Easy no?
Complete program is below:

pro process_file textfile='E:\field_data.csv' ;myTemplate=ascii_template(textfile) ;save, myTemplate,filename='E:\myTemplate.sav' restore, 'E:\myTemplate.sav' data = read_ascii(textfile, template=myTemplate) ; now data are in data.field1, data.field2 etc. ; to see: help,data,/structure data.field2=strcompress(data.field2) ; what is the list of id (i.e. of pits)? ; Caution: assume list already sorted, i.e. pits id are not mixed... ; get list of pits id listpits=data.field1[uniq(data.field1)] ; loop over the list of pits for ipid=0, n_elements(listpits)-1 do begin ; now get list of depths NAMES wherePits = where(data.field1 EQ listpits[ipid]) allDepths=data.field2(wherePits) listDepths=allDepths[uniq(allDepths)] ; now for this pit id, sum for each type of depths for idepths=0, n_elements(listDepths)-1 do begin ; get position of data to sum wts = where( (data.field1 eq listpits[ipid]) AND ( strcmp(data.field2, listDepths[idepths]) ) ) print, 'pits: ',strcompress(listpits[ipid]), ', at depth: ',  listDepths[idepths],' cm total root length is ', total(data.field5[wts]) endfor endfor end


Wednesday, November 18 2009

install gdal on Mac OS X


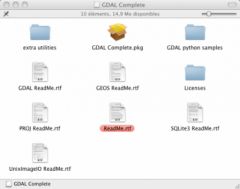
Mac OS X is built on Unix BSD and thus offers terminal and bash for good old scripting. To add gdal and its executables (gdal_translate, gdal_merge.py etc.), go first downloading the framework prepared by KyngChaos http://www.kyngchaos.com/software:frameworks and download Gdal Complete.dmg.

The adaptation done for Mac OS X  is just perfect! To make it run: mount the dmg, then double click on the installation package. Once the installation is done, you must set the PATH variable for bash.

Launch Terminal, then type

export PATH=/Library/Frameworks/GDAL.framework/Programs:$PATH

This command adds /Library/Frameworks/GDAL.framework/Programs to the search PATH.

If you want to save this setting, edit the hidden file .bash_profile in your home directory, and add the above command line; then save. For beginners: the dot ‘.’ before bash_profile corresponds to a hidden file. To immediately set the path, type

source .bash_profile

Anyway, .bash_profile will be read again next time you run a terminal.

Enjoy!