Zero-1-Earth!

To content | To menu | To search

Monday, September 3 2012

Hidden behavior in a bash script

Today I stumbled upon the following challenge: I have some scripts that are supposed to receive 0 or 1 parameter. If the script receives 0 parameter, it returns a "usage" message and exit. I needed to change my scripts so that they can return a public interface specification without introducing new parameters (I have tenth of similar script and a mechanism calling them).

The basic idea is to set a global variable $SCRIPT_PUBLICINTERFACE to change the script behavior, so that an information-collecting script can get information from the scripts, without having to pass any parameter. This approach avoid changing significantly the structure of my scripts.

Here is my implementation for the scripts, followed by the "function" library.

#!/bin/bash
NPARAM=$#
# load library
source functions

function usageMessage(){
    echo "Script stoped with error: "$1
    echo "Script usage:"
    echo "  please set/unset variable SCRIPT_PUBLICINTERFACE to show/hidde publicInterface"
    echo "  example: "
    echo "   export SCRIPT_PUBLICINTERFACE=1"
    echo "   ./script.sh"
    echo "   unset SCRIPT_PUBLICINTERFACE"
    echo "   ./script.sh"
    exit 1
}

echo "The script is running and calling the usage function"
if [ $NPARAM -eq 0 ]; then
       usage "calling the usage function"
fi

Hereafter the 'function' library:

function usageMessage(){
         # default usageMessage. Overridden by user function
         echo "Script ${0##*/} received the error message:" $1
         echo "Please define a specific usageMessage function for this script."
}

function usage(){
        if [ -z "$SCRIPT_PUBLICINTERFACE" ]; then
            usageMessage "$1"
            return 0
         else
            printPublicInterface
            exit 1
         fi
}

function printPublicInterface(){
cat << EOF
<?xml version="1.0">
<dict>
...write here your xml file content...
</dict>
EOF

The user defines a "userMessage' function which contains the text to display in case of error, or if the script is called with no parameter. In case that the user forgets declaring such a function, there is a default definition in the library. The usage function checks if the global variable is set, and calls usageMessage or the function to output the public interface.
Sunday, May 2 2010

testing files integrity across an archive of data

I currently cooking a system, largely based on bash, to collect remote sensing data from the web. Since I’m using my personal ADSL connection, I can expect to have many corrupted downloads. I made a little script to check files integrity, and trigger again their download.

First, how to know if a file is corrupted or not? Two technics: either your collect the error code from you download software (ftp here) and log them somewhere to try again or you are able to assess the integrity of a file simply by scanning it. Let’s consider the second case.

The central problem is that you may have various kind of file, so there is not a method per kind of file to check. For example, if we download modis files we have an xml and an hdf file. For a given file, the script must first guess the type of file, then choose an ad-hoc function for checking this file. We assume here that the file type is found by considering the file extension.

To get the file extension from a full file path, simply remove the file path and keep what you find after the last ‘.’, which is a job for sed:

echo $fileFullPath | sed 's/^.*\///' | sed 's/^.*\.//' | tr '[:upper:]' '[:lower:]'

Command

sed 's/^.*\///'

removes the file path, by substituting repetitions (*) of any characters (.*) with nothing, starting from the string beginning (^). Then anything up to the last point is removed (think to escape the point \.).
Note that the regular expression of your system may give different result: give it some tries.

Now we need to call the appropriate test routine as a function of the detected file extension: a simple case function will do this job. Finally, let’s wrap-up everything in a single function (selectFunc): call it with a file name, and it returns the test function to call.

function selectFunc(){
# receives a file name and decides which integrity test function corresponds
if [ $# -ne 1 ]; then
echo "selectFunc is missing a single parameter. Exit."
return -1
fi
selector=$(echo $1 | sed 's/^.*\///' | sed 's/^.*\.//' | tr '[:upper:]' '[:lower:]')
case $selector in
xml) selectFunc='doTestXML';;
hdf) selectFunc='doTestImg';;
tif | tiff ) selectFunc='doTestImg';;
esac
# return the selected function
echo $selectFunc
}

We can see that there is a pending problem with respect to file without an extension, like ENVI native file format (it does not require an extension, only a companion text file). To improve this situation, you can either force an extension to this kind of files (like .bil or .bsq for ENVI files), or handle the case of missing extension with additional tests. For example, one could image to call gdalinfo in this case.

Now we just have to write some test functions.

xml files are rather easy to test. Your OS should have a function for that. For Linux, consider xml Starlet, which command line is

xml -val $file

For images, you should be able to test most of them with gdalinfo.
The function return 0 is everything was ok, 1 else. Actually, the tests functions return the return code of xml starlet and gdalinfo. If you use other kind of test, you may need to translate their exit codes.
At the end, we’ve got something like:

function doTestXML(){
if [ $# -ne 1 ]; then
echo "doTestXML is missing a single parameter. Exit."
exit -1
fi
xmlwf $1 >& /dev/null
return $?
}

function doTestImg(){
if [ $# -ne 1 ]; then
echo "doTestXML is missing a single parameter. Exit."
exit -1
fi
gdalinfo $1 >& /dev/null
return $?
}

Note we sent to null any output of the function and take care only of the return code ($?).

Now, all to use this code:
get the name of the test function to call:

myTest=$(selectFunc $file)

and call the script:

$myTest $file

A functional copy of the code is found there.


Saturday, April 24 2010

Building global gtopo30

GTOPO30, completed in late 1996, was developed othrough a collaborative effort led by the U.S. Geological Survey’s Center for Earth Resources Observation and Science (EROS). GTOPO30 is a global digital elevation model (DEM) with a horizontal grid spacing of 30 arc seconds (approximately 1 kilometer).

Gtopo30 is provided in tiles. Here is how to mosaic them into a single mosaic. First download from GTOPO30 the tiles you need to mosaic. Then write a script like the one I describe below (save it and change its permission to make it executable, chmod u+x make_gtopo30.sh)

First let’s define parameters.

inDir=/Volumes/TimeMachine/data/gtopo30/in
outDir=/Volumes/TimeMachine/data/gtopo30/out
outFile=$outDir/gtopo30_global.tif
tmpDir=/Volumes/TimeMachine/data/gtopo30/tmp
# ensure outDir and tmpDir are created
mkdir -p $outDir
mkdir -p $tmpDir

You must adapt those variables to the actual places where you saved the tiles (inDir), and where you want to have the result saved (outDir) and the temporary directory (tmpDir).

Then extract all files, with tar xvf (x=extract, v=verbose, f=file). tar command is a bit dull or old fashion. To force it to extract files into tmpDir while the tar files are in inDir, I saved the current directory (orgDir=$(pwd)) then moved to the target dir (tmpDir) and once all extracted, returned to the original directory:

orgDir=$(pwd)
cd $tmpDir
for tarFile in $inDir/*.tar
do
tar xvf $tarFile
done
cd $orgDir
Now, we are ready to build a mosaic. First get names of the files to process: DEM files have the .DEM extension. Save the list of these files into a variable, and pass it to gdal_merge.py
fileList=$(ls $tmpDir/*.DEM)
gdal_merge.py -o $outFile -of gtiff -co "compress=lzw" $fileList
Job done! Do  not forget to delete the temporary directory
\rm -r $tmpDir

For a global mosaic, I ended with a 2.2Gb file (with internal compression). You can of course force the output resolution by using the -ps option in gdal_merge.py.

You can download the script from here.


Thursday, April 22 2010

Screensaver with QuartzComposer

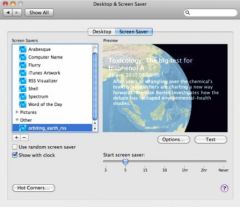
Quartz Composer is a wonderful tool to program some animations with Core Graphics. I made a simple example, showing a rotating sphere, on which I mapped an Earth background, and displaying an RSS feed on top.

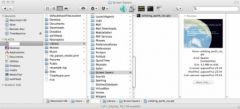
You can download this example and install it as a screen saver.

Note: you don’t need to have Quartz Composer installed to play this screen saver:

1- download it from http://combal.free.fr/data/orbiting_earth_rss.qtz

2- save it in your library, in the ‘Screen Savers’ section

3- Launch the screen saver panel (System Preferences/Desktop & Screen Saver), you should be able to select the screen saver under the tab ‘others’. You can then configure it, and also change the RSS feeds (I set it to nature.com).

Enjoy!


Tuesday, April 20 2010

Removing 10 first lines of a text file

How to remove the 10 first lines of a text file? Easy job with sed (Stream EDitor):

sed '1,10d' myFile

Example: removing 10 first lines of all text files in a directory.

for file in *.txt
do
sed '1,10d' $file > output_dir/new_${file}
done

Further readings: 

Tuesday, April 6 2010

ntfs hard drive on Snow Leopard

Note: this post proposes a trick at your own risks!

I’m willing to backup-up 1.5Tb of data I have on my office computer, and use them on my Mac OS X (Snow Leopard) computer at home. By default, Mac OS X can format, read and write Fat32 (MS-DOS) to share an hard drive with a Windows PC. Unfortunately, MS-DOS format is a bit outdated, and would not support partition larger than 1Gb, which would force me to make two partitions on my drive, while I would prefer only one.

Although it is not visible by default, Mac OS X Snow Leopard (10.6) support NTFS. To activate the support, you must declare your new drive in /etc/fstab (the file used by Unix/Linux systems to mount devices).

You must first get some infos: plug in your hard drive. In my case, the drive mounts with the name “Elements”.

open a terminal and type the following command:

diskutil info /Volumes/Elements

you’ll see more information about the drive, check it is NTFS formatted.

By default, file /etc/fstab is not created on Mac OS X. If it already exists, make a copy first:

sudo cp /etc/fstab /etc/fstab_org

sudo command will prompt for the administrator password (to run the copy command in directory /etc where you should not have rights to write as a normal user).

edit it (you can use nano to edit the file, or any other plain text editor):

sudo nano /etc/fstab

and add the line:

LABEL=Elements none ntfs rw

(replace Elements with the label name of your hard drive).

Reboot the computer to force reading /etc/fstab and mounting your drive as a read/write NTFS drive.

Job done!

For perfectionists: if your drive shows a UUID when you enter command diskutil info /Volumes/Elements, then you can edit your /etc/fstab with

UUID=XXXXXXX none ntfs rw

where XXXXXXX is the UUID number shown by diskutil. This should allow recognizing the drive even if you change its label name.

Monday, February 22 2010

Transform a simple tiff into geotiff

How to transform a simple tiff, or any image, into a georeferenced image, for example a geotiff. Quite simple with gdal_translate.

For this example, I took a random image, actually a photo of two elephants I took in Botswana. gdalinfo gives the following information about this image:

Driver: GTiff/GeoTIFF
Files: IMG_8552.tif
Size is 3456, 2304
Coordinate System is `'
Metadata:
TIFFTAG_DATETIME=2009:08:22 09:22:37
TIFFTAG_XRESOLUTION=72
TIFFTAG_YRESOLUTION=72
TIFFTAG_RESOLUTIONUNIT=2 (pixels/inch)
Image Structure Metadata:
INTERLEAVE=PIXEL
Corner Coordinates:
Upper Left  (    0.0,    0.0)
Lower Left  (    0.0, 2304.0)
Upper Right ( 3456.0,    0.0)
Lower Right ( 3456.0, 2304.0)
Center      ( 1728.0, 1152.0)
Band 1 Block=3456x12 Type=Byte, ColorInterp=Red
Band 2 Block=3456x12 Type=Byte, ColorInterp=Green
Band 3 Block=3456x12 Type=Byte, ColorInterp=Blue
Driver: GTiff/GeoTIFFFiles: IMG_8552.tifSize is 3456, 2304
Coordinate System is `'Metadata:  TIFFTAG_DATETIME=2009:08:22 09:22:37  TIFFTAG_XRESOLUTION=72  TIFFTAG_YRESOLUTION=72  TIFFTAG_RESOLUTIONUNIT=2 (pixels/inch)
Image Structure Metadata:
INTERLEAVE=PIXEL
Corner Coordinates:Upper Left  (    0.0,    0.0)
Lower Left  (    0.0, 2304.0)
Upper Right ( 3456.0,    0.0)
Lower Right ( 3456.0, 2304.0)
Center      ( 1728.0, 1152.0)
Band 1 Block=3456x12 Type=Byte, ColorInterp=RedBand 2 Block=3456x12 Type=Byte, ColorInterp=GreenBand 3 Block=3456x12 Type=Byte, ColorInterp=Blue

As you can see there is absolutely no geographic information yet. Let’s says, even if it is absurd for this photo, that the corners are geolocated. gdal_translate options -a_ullr ulx uly lrx lry overrides the georeferenced bounds of the ouptut file and -a_srs srs_def overrides the projection for the output file.
Let’s give it a try:

gdal_translate -of gtiff -co "compress=LZW" -a_ullr -26 38 0 0 -a_srs "wgs84" IMG_8552.tif withCoordinates.tif

Now the result is georeferenced, as demonstrated by gdalinfo:

Driver: GTiff/GeoTIFF
Files: withCoordinates.tif
Size is 3456, 2304
Coordinate System is:
GEOGCS["WGS 84",
DATUM["WGS_1984",
SPHEROID["WGS 84",6378137,298.2572235630016,
AUTHORITY["EPSG","7030"]],
AUTHORITY["EPSG","6326"]],
PRIMEM["Greenwich",0],
UNIT["degree",0.0174532925199433],
AUTHORITY["EPSG","4326"]]
Origin = (-26.000000000000000,38.000000000000000)
Pixel Size = (0.007523148148148,-0.016493055555556)
Metadata:
AREA_OR_POINT=Area
TIFFTAG_DATETIME=2009:08:22 09:22:37
TIFFTAG_XRESOLUTION=72
TIFFTAG_YRESOLUTION=72
TIFFTAG_RESOLUTIONUNIT=2 (pixels/inch)
Image Structure Metadata:
COMPRESSION=LZW
INTERLEAVE=PIXEL
Corner Coordinates:
Upper Left  ( -26.0000000,  38.0000000) ( 26d 0'0.00"W, 38d 0'0.00"N)
Lower Left  ( -26.0000000,   0.0000000) ( 26d 0'0.00"W,  0d 0'0.01"N)
Upper Right (   0.0000000,  38.0000000) (  0d 0'0.01"E, 38d 0'0.00"N)
Lower Right (   0.0000000,   0.0000000) (  0d 0'0.01"E,  0d 0'0.01"N)
Center      ( -13.0000000,  19.0000000) ( 13d 0'0.00"W, 19d 0'0.00"N)
Band 1 Block=3456x1 Type=Byte, ColorInterp=Red
Band 2 Block=3456x1 Type=Byte, ColorInterp=Green
Band 3 Block=3456x1 Type=Byte, ColorInterp=Blue

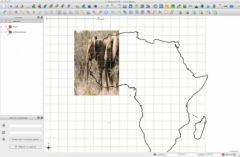
and QuantumGis can easily use this image as geospatial raster:

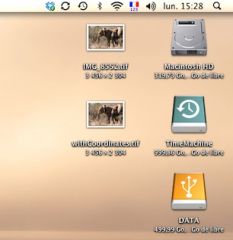
Mac OSX sees the image as any tiff image:

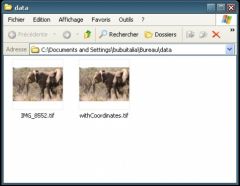
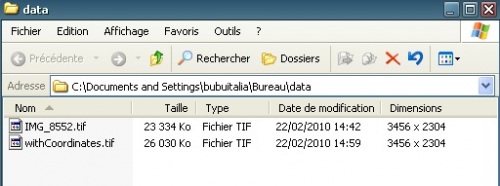
Same thing with Windows, images are seen as normal tiff images, Windows show their quicklook and dimensions, geographical meta-data are ignored.


Thursday, November 19 2009

Text file processing with IDL

A friend recently asked me how to process a text file. It was a collection of measurements of plants roots (size and mass) made at various depths from different pits; looking like (after some formatting):

id depth_name mass size 1 30-50 0.5 10 1 30-50 0.45 3 1 30-50 0.3 4.2 1 50-70 0.7 5 1 50-70 0.72 5.3 ... ... ... ... 2 30-50 0.8 4

This friend needed to sum up roots lengths for a same pit and depth.
First you have to format well your file. By well formatted, I mean: use a separator like a comma ‘,’ or a space (if not ambiguous). Then read the file with the READ_ASCII command:

pro process_file
textfile='path/to_my/textfile.txt'
data=read_ascii(textfile, template=ascii_template(textfile))
end
read_ascii

excepts a file template (you can indicate to jump some heading line, choose a column separator and indicate the data type per column). In this case, I choose a string format for the second column.
Alright. The read_ascii command stores the text file value in the data structure. In this case, data has the following fields:
data.field1 stores pits ids
data.field2 stores depths labels
data.field3 stores the mass column
data.field4 stores the roots length column.
Note the structure is ‘field’ par idl, you can’t change it.

Le’s say we want the list of pits ids:

listpitds=data.field1(uniq(data.field1))
uniq function returns ending position of continuous series of values in an array.
Let’s loop over the list of pit ids, and for each pit id, get the list of unique depths-labels (again!) and for these selected lines, sum up roots lengths:

for ipid=0, n_elements(listpits)-1 do begin ; now get list of depths NAMES wherePits = where(data.field1 EQ listpits[ipid]) allDepths=data.field2(wherePits) listDepths=allDepths[uniq(allDepths)] ; now for this pit id, sum for each type of depths for idepths=0, n_elements(listDepths)-1 do begin ; get position of data to sum wts = where( (data.field1 eq listpits[ipid]) AND ( strcmp(data.field2, listDepths[idepths]) ) ) print, 'pits: ',strcompress(listpits[ipid]), ', at depth: ',  listDepths[idepths],' cm total root length is ', total(data.field5[wts]) endfor endfor

Easy no?
Complete program is below:

pro process_file textfile='E:\field_data.csv' ;myTemplate=ascii_template(textfile) ;save, myTemplate,filename='E:\myTemplate.sav' restore, 'E:\myTemplate.sav' data = read_ascii(textfile, template=myTemplate) ; now data are in data.field1, data.field2 etc. ; to see: help,data,/structure data.field2=strcompress(data.field2) ; what is the list of id (i.e. of pits)? ; Caution: assume list already sorted, i.e. pits id are not mixed... ; get list of pits id listpits=data.field1[uniq(data.field1)] ; loop over the list of pits for ipid=0, n_elements(listpits)-1 do begin ; now get list of depths NAMES wherePits = where(data.field1 EQ listpits[ipid]) allDepths=data.field2(wherePits) listDepths=allDepths[uniq(allDepths)] ; now for this pit id, sum for each type of depths for idepths=0, n_elements(listDepths)-1 do begin ; get position of data to sum wts = where( (data.field1 eq listpits[ipid]) AND ( strcmp(data.field2, listDepths[idepths]) ) ) print, 'pits: ',strcompress(listpits[ipid]), ', at depth: ',  listDepths[idepths],' cm total root length is ', total(data.field5[wts]) endfor endfor end


Wednesday, November 18 2009

install gdal on Mac OS X


Mac OS X is built on Unix BSD and thus offers terminal and bash for good old scripting. To add gdal and its executables (gdal_translate, gdal_merge.py etc.), go first downloading the framework prepared by KyngChaos http://www.kyngchaos.com/software:frameworks and download Gdal Complete.dmg.

The adaptation done for Mac OS X  is just perfect! To make it run: mount the dmg, then double click on the installation package. Once the installation is done, you must set the PATH variable for bash.

Launch Terminal, then type

export PATH=/Library/Frameworks/GDAL.framework/Programs:$PATH

This command adds /Library/Frameworks/GDAL.framework/Programs to the search PATH.

If you want to save this setting, edit the hidden file .bash_profile in your home directory, and add the above command line; then save. For beginners: the dot ‘.’ before bash_profile corresponds to a hidden file. To immediately set the path, type

source .bash_profile

Anyway, .bash_profile will be read again next time you run a terminal.

Enjoy!

Wednesday, November 11 2009

interpolating colors

I’m starting a little project: making a python function to apply a color scheme to a gray level image.

For that we need: to read the image (job done by gdal), read a color scheme, get image min an max excluding no data values, interpolate the color scheme, and last but not least, transform the single band gray level into an rgb image.

For today, let’s start with the color interpolation function. Color can be interpolated in rgb, hsv, etc. Let’s write something for rgb, easily portable to other color space.

The idea is to consider separately the 3 color axis and interpolate along them:

def interpolateColor(rgbMin, rgbMax, maxDepth, depth):
if depth <= 0:
return rgbMin
if depth >= maxDepth:
return rgbMax
rgb=rgbMin
for iTriplet in range(3):
minVal=rgbMin[iTriplet]
maxVal=rgbMax[iTriplet]
rgb[iTriplet] = int(minVal + (maxVal-minVal)*(depth/float(maxDepth)))
return rgb
def test():
rgbMin=[128, 0 ,34]
rgbMax=[255, 56, 0]
niter=10
for ii in range(niter):
print ii, interpolateColor(rgbMin, rgbMax, niter, ii)

To test it:

import interpolateColor
interpolateColor.test()

You should get the 9 intermediate colors.


Thursday, October 29 2009

python-gdal: simple file processing

Here is a simple example of image processing with python and gdal.

Say we want to make a mask from an image, 0 if data<10, 1 else.
The strategy is the following:

  • open the input file
  • create an output file, geotiff, byte
  • read the input file line by line
  • test values and write to the output

First, let’s import some libraries. I use the following snippet in any of my codes, so it must (may?) work with most of the gdal/numpy libraries settings:

try:
from osgeo import gdal
from osgeo.gdalconst import *
gdal.TermProgress = gdal.TermProgress_nocb
except ImportError:
import gdal
from gdalconst import *
try:
import numpy as N
N.arrayrange = N.arange
except ImportError:
import Numeric as N
try:
from osgeo import gdal_array as gdalnumeric
except ImportError:
import gdalnumeric

Now let’s define file names, and the threshold value. You can read something else than a geotiff file in input, gdal should do the job for you.

file='/data/demo/input.tif'
outfile='/data/demo/output.tif'
value=1

The lines below open the input file, and get from it its width and height.

fid = gdal.Open(file, GA_ReadOnly)
ns = fid.RasterXSize
nl = fid.RasterYSize

The output file is created, with the same dimensions, 1 single band, its type is set to Byte (GDT_Byte), format forced to geotiff, options are left empty. Note that options is an array of strings, we’ll see in another post what can be done with it. The output file get same projection and geotransformation as the input. Geo transformation is an array of float indicating the upper left corner coordinates and pixel size.

outDrv = gdal.GetDriverByName('GTiff')
options=[]
outDs  = outDrv.Create(outfile, ns, nl, 1, GDT_Byte, options)
outDs.SetProjection(fid.GetProjection())
outDs.SetGeoTransform(fid.GetGeoTransform())

Preparation is done, it is now enough to parse the input file line by line.
At each iteration the output array is set to 0 (default value), places where data is found greater than the given threshold being set to 1.

Note that ReadAsArray returns a 2-D array. N.ravel transforms it in a single array on which operations like dataOut[data>value]=1 can be applied. To write this array to a file you MUST give it 2 dimensions, which is achieved with dataOut.shape=(1,-1).

datazeros=N.zeros(ns)
for il in range(nl):
data = N.ravel(fid.GetRasterBand(1).ReadAsArray(0, il, ns, 1))
dataOut = datazeros
dataOut[data>value]=1
dataOut.shape=(1,-1)
outDs.GetRasterBand(1).WriteArray(N.array(dataOut), 0, il)

Job done!


Monday, September 28 2009

Time machine freezed with a fire wire cable

Although I prefer my DYI backup system, I also tried Time Machine on my Mac Mini, on Leopard.

Problem: After making some save sessions ok, Time Machine was in 'update' status for hours without saving anything, forcing me to reboot the machine (could not even kill the app cleanly)!

I changed the disk format to GUID as suggest in http://support.apple.com/kb/TS1550?viewlocale=en_US, still had the problem.

I finally found it was due to the fire wire cable. I changed to USB2 connection: no problem anymore!

No clue if it was the electronic on board the external drive (no-name hardware) or compatibility or bug in Leopard, anyway changing the cable solved everything.

May worth to try.

Thursday, September 10 2009

Faster loop in Python

If found this today: I had a loop for scanning an image line by line:

for il in range(ystart, yend+1):

data = N.ravel(fid.GetRasterBand(band+1).ReadAsArray(xstart, il, ns,1))
wts = (data != 0)

if wts.any():

index = N.arange(ns*nl)
jpos  = index / ns
ipos  = index - jpos * ns
jmin = jpos.min()
jmax = jpos.max()
imin = ipos.min()
imax = ipos.max()
etc...

The loop was pretty slow.  I thought it was coming from computation on the arrays in the 'if' statement. Actually, by commenting those lines, I realized it was due to the creation of the index array:
index = N.arange(ns*nl)
To (significantly) speed up the loop, I simply had to create first a reference indexRef array to avoid creating it in the loop.

indexRef = N.arange(ns*nl)
for il in range(ystart, yend+1):

data = N.ravel(fid.GetRasterBand(band+1).ReadAsArray(xstart, il, ns,1))
wts = (data != 0)

if wts.any():

index = indexRef[wts]
jpos  = index / ns
etc...


Monday, August 17 2009

Is a script running?

On a *nix system, it is often desirable to ensure that a script is running as a singleton (I borrow the C++ term). For example, if a process is scheduled to run every 10min and for some reason last for 11, for sure you don't want it to be run again.

There are some tricks, like locking a socket and checking its status before running, but I guess it impose quite a lot of programmation, maybe a bit difficult for a shell script. A simpler way is to trigger the script from another one (let's call it singleton) that is charged to check if the script (cunningly named myCommand) is already running or not, like:

singleton myCommand

What should do singleton? Well, there are two cases: either myCommand is an executable directly run by the system or it is a script. If it is an executable, then pidof let's you check if it is running:

pidof -s -x myComnand

Now, if myCommand is a script, starting with a shabang (#!/bin/bash or #!/bin/env python, etc) pidof won't find anything since the program actually running is bash or python and myCommand is only a parameter. Check it with ps -eaf | grep myCommand and you'll see:

/bin/bash myPath/myCommand.sh

To check if myCommand is executed, the simplest is to list processes, grep lines with myCommand.sh. Don't forget to add an inverse grep on grep itself (grep -v grep):

result=$(ps -eaf | grep -v grep | grep myCommand)

if [ -z "$result" ]; then

   myCommand

fi

Of course, you can be less restrictive when selecting processes from ps. In this case, singleton won't run anything if you are editing the script (example vi myCommand.sh) or simpling displaying it (e.g. cat myCommand.sh). It is up to you to set the restriction.

Monday, April 6 2009

Transfer iPhoto library from a mac on Tiger to a mac on Leopard

I recently bought a mac mini with Leopard (mac os x 10.5.6). I wanted to install my iPhoto library from my old (already 5 years old) powerbook running on mac os x 10.4. How to do?

Well, I tried to use the migration assistant. Unfortunately, the user profile on the powerbook and on the mac mini are different (different user name). The migration assistant simply created on the mac mini a profile for the powerbook user profile I was importing. In a word, the migrated photo library was not available on my mac mini profile. How sad. To have the iPhoto database running, I simply copied the iPhoto library to my profile, updated the user permissions (to have read/write permissions on all files) and ran iPhoto.

Caution: this works, but would overwrite any images that would be already imported in your new computer!!!

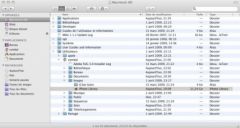
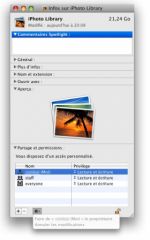
Step by Step (sorry, snapshots are done in french...):

  • files to import are in //hd/users/your-profile/Library/images/iphoto Library
  • copy those files in your new computer, at the same place. CAUTION: this will destroy any already existing files!!!!
  • On the "iphoto Library" directory, right-click, information, 
  • run iPhoto !

Monday, March 2 2009

Set up wifi on a msi wind notebook

Continue reading...

Thursday, January 8 2009

Installer le wifi sur MSI Wind netbook U100

Je viens d'acheter un MSI Wind U100, sous Linux SLED (Suse Linux Enterprise Desktop). Malheureusement, cette distribution est basée sur SUSE 10.1, totalement dépassée (SUSE est à la version 11). Installer une application devient vite un cauchemar dès qu'il faut résoudre des dépendances, car la plupart des librairies ne sont plus maintenues.

J'ai donc installé Ubuntu 8.10 (Intrepid Ibex). Le Wifi de mon MSI Wind U100x (acheté en décembre 2008) n'est pas pris en charge par défaut. Ma carte est une RaLink comme le montre la commande lspci:
01:00.0 Ethernet controller: Realtek Semiconductor Co., Ltd. RTL8101E/RTL8102E PCI Express Fast Ethernet controller (rev 02)
02:00.0 Network controller: RaLink Device 0781

Le driver de la RaLink 0781 est rt2860.
Après quelques recherches, voici comment j'ai procédé pour installer ce driver:
J'ai commencé par installer build-essential:

sudo apt-get install build-essential

Puis j'ai installé le driver pour ma carte:
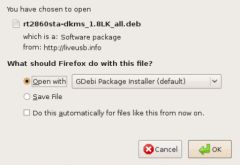
http://liveusb.info/ralink/rt2860sta-dkms_1.8LK_all.deb;
L'installation se lance automatiquement au téléchargement du package.

J'ai rebooté la machine pour être sûr que tous les services seraient relancés, ça marche: j'ai la liste des wifi de l'immeuble!

Thursday, December 25 2008

DIY backup system

Continue reading...

Thursday, December 18 2008

Some tips on HDF5 files

In general, my users ask me to export HDF formatted images into something directly usable with GIS desktop software (Geotiff, Erdas Imagine, etc.)

The problem with HDF is that it is not an image format but a data container format: it's very general, can contain any type of object (variables, arrays, images...). The best way to handle this format is to write some lines of code to browse the file internal table storing the meta information.

From the command line, you can use gdalinfo to get some meta-information. The meta information can be more or less complex depending on what was stored in the HDF file. Let's consider an HDF5 file, which metainformation would be

Driver: HDF5/Hierarchical Data Format Release 5 Size is 512, 512 Coordinate System is `' Subdatasets: SUBDATASET_0_NAME=HDF5:"HDF5_LSASAF_MSG_FVC_SAme_200806100000"://FVC SUBDATASET_0_DESC=1511x701 //FVC (8-bit integer) SUBDATASET_1_NAME=HDF5:"HDF5_LSASAF_MSG_FVC_SAme_200806100000"://FVC_QF SUBDATASET_1_DESC=1511x701 //FVC_QF (8-bit character) SUBDATASET_2_NAME=HDF5:"HDF5_LSASAF_MSG_FVC_SAme_200806100000"://FVC_err SUBDATASET_2_DESC=1511x701 //FVC_err (8-bit integer) Corner Coordinates: Upper Left ( 0.0, 0.0) Lower Left ( 0.0, 512.0) Upper Right ( 512.0, 0.0) Lower Right ( 512.0, 512.0) Center ( 256.0, 256.0)

In HDF you can store different types of data in the same file, the Size information for the file is not meaningful in this case (here it is written that Size is 512, 512, which is wrong since the actual size of the images is given on the lines with the SUBADATASET_0_DESC.

The image size given in the header is not meaninful: the images are 1511x701 lines, as indicated in the line SUBDATASET_0_DESC and not 512x512 in the header. The same SUBADATASET_0_DESC line gives you the file type.

The example above is about an HDF5 image, but FWTools can also handle HDF4 images.

Now, to export the image to something easier to handle, you must give the dataset name to gdal_translate, not the hdf5 file name:

gdal_translate -of gtiff HDF5:"HDF5_LSASAF_MSG_FVC_SAme_200806100000"://FVC fvc.tif

to export the data set named FVC into a single image.

Friday, December 12 2008

About image files internal compression

Did you know that some image file formats support internal compression? This means that the data can be compressed inside the file, the decompression being done on the fly when you open the image in a software, the task being done by the image driver. By using internal compression, you do not need to zip your files to save space on disk, and no file is created when you read the image. It worth to be considered also when your files are stored on a remote hard drive (you may save a lot of processing time).

There are two types of compression: with information loss, like jpeg, or loss-less. Lossless compression allows the exact original data to be reconstructed from the compressed data. Lossy data compression only allows an approximation of the original data to be reconstructed, in exchange for better compression rates (often used in photography).

I use to store all my data in geotiff + internal lossless compression. Gdal offers three lossless compression for geotiff: LZW, deflate and packbits. I use LZW because it is implemented on all commercial software, but deflate seems to give better compression rate.

Exporting an image, say image.img to geotiff + compression geotiff, say new_image.tif, is simple:
gdal_translate -of Gtiff -co "compress=lzw" image.img new_image.tif

Let's take an example of an NDVI image of Africa, say 9633*8117 pixels, 1 byte per pixel. The data amount is about 75Mb. If using geotiff with LZW compression, I've got file sizes of about 30Mb (the actual size varies a bit from an image to another).
I also have data which are the detection of surface water on the continent. I typically have 5 classes: the ocean, the dry land and three classes of surface water. Then the geotiff +LZW files are around 2Mb!

The time spent on decompression is not noticeable. In my case, it is even the opposite: I've a (very) large repository of images (Spot/vegetation images of Africa), stored on a remote machine: internal compression saves network bandwidth and time: reading a file of 2Mb vs 75Mb makes a big difference!

- page 1 of 2